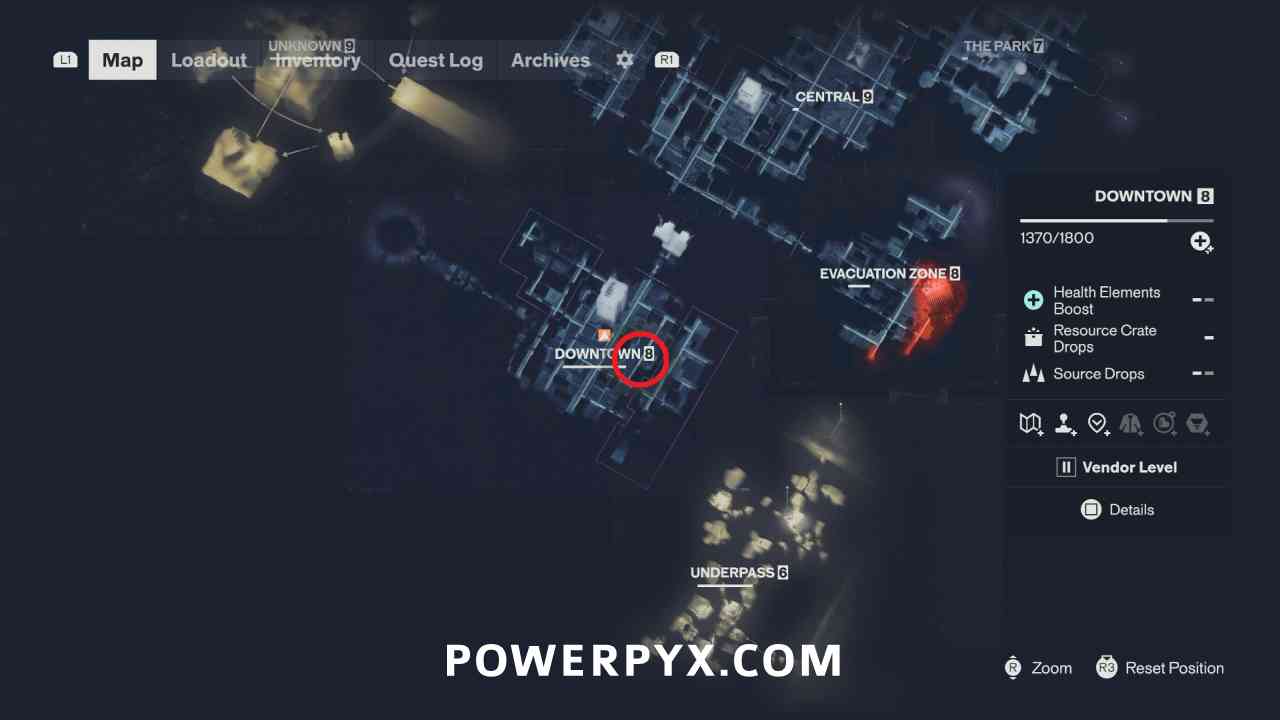
While the Oldest House sat under lockdown, FBC researchers kept running experiments inside testing sites hidden all over Manhattan — and whatever they were working on has clearly gotten out of hand. Unsupervised Science sends Dylan to all six of those sites to shut the experiments down for good. It is one of the three side quests that feed the Threshold Researcher trophy, alongside The Last Taxi and Crossing the Threshold — thirteen thresholds in total between the three of them. Every facility in this quest also doubles as a collectible location, since the full set of 6 Testing Facilities is tracked on the same map page.
How to Start
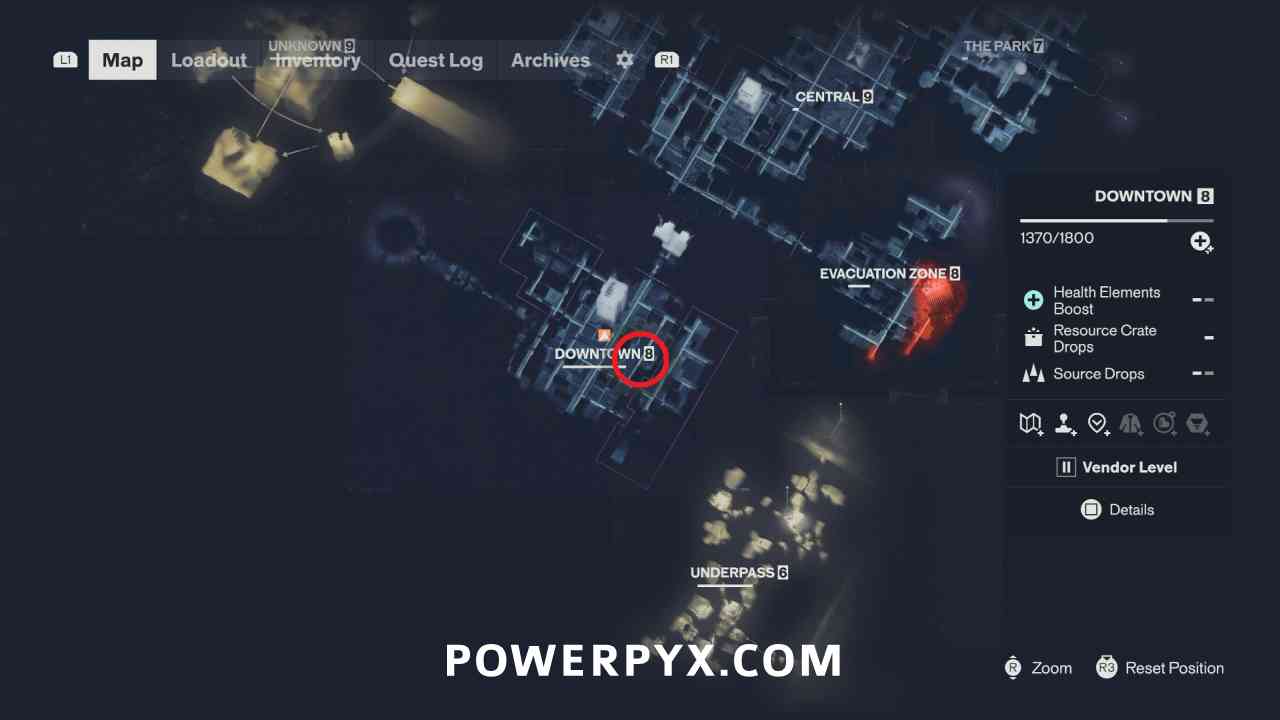
The quest begins the moment Dylan walks into any Testing Facility — there is no quest giver to speak to first. Each site is marked on the map with a computer icon, and there is exactly one facility per zone: Downtown, Central, Evacuation Zone, West Incursion Zone, The Park, and The Unknown. The Underpass has no facility at all. Entering the first one adds the quest to the log automatically, with the six zones listed under the "Shut Down the Experiments" objective.
The entrances are deliberately easy to walk past. Most facilities are reached through sewer pipes located near their computer icon on the map, and construction sites are the most common hiding spot — a few map markers even carry the label "Testing Facility Reade." No special ability or story gate is needed to get inside; the only requirement is being able to reach the zone that holds the site. The six shutdowns can be handled in any order, so it makes sense to clear whichever facilities sit along the player's current zone route and mop up the rest later.
Walkthrough
Every facility follows the same closing loop: solve the room's puzzle, flip the switch beside the computer icon to shut the experiment down, then grab the Power Upgrade crate from the newly unlocked corner room. Only two puzzle archetypes appear across all six sites, so after solving one of each, the rest are variations on familiar mechanics. Both puzzle types are described in full below, once per facility.
1. Testing Facility 1 — Downtown
The Downtown site is reached through the construction site in the Deserted Area. On the ground floor of the site, drop into a pipe that runs east into the facility. The puzzle here is the object-transformation type: five objects stand around the room, and they must be carried onto the squares in the middle. Each object changes form whenever the player crosses the lines on the floor while carrying it, and the goal is to set all five down as soda machines.
The catch is that the starting objects are randomized per player, so there is no single fixed route — the practical approach is to carry items toward the middle and walk loops around the T-shaped intersections, since objects cycle through four forms and can be switched between three of them at the intersections beside each placement spot. Keep circling until everything reads as a soda machine. Once all five are placed, interact with the switch near the computer icon. If the switch refuses to turn green, pick up the audio log lying beside it first — that registers the quest properly and the switch works. The unlocked corner door holds a Power Upgrade crate.
2. Testing Facility 2 — Central
The Central facility is entered through a pipe in an open pit southeast of the Patterned Factory. This site uses the charge-core puzzle: four cores, with two charges present at the start. Interact with the switch (the blue circle) to begin a 60-second timer, and spend that minute shuttling charges between cores so none of them overload.
A core currently holding a charge glows blue; an empty one glows red. The rhythm is to grab from a blinking blue spot and place onto a blinking red spot, over and over. It looks chaotic, but each spot tolerates roughly 15 seconds before forcing a restart — repeatedly taking the charge from the second-most-recently-placed blue spot and moving it onto a red one carries the full minute even when the blinking speeds up. Survive the 60 seconds and all stations turn green. Then flip the switch by the computer icon and collect the Power Upgrade crate from the unlocked corner door.
3. Testing Facility 3 — Evacuation Zone
This one is reached through a pipe directly below the Survivalist's Bunker fast travel door — the route in starts at the parking garage near the "Unauthorized mines?" text on the map. The puzzle is the same object-transformation type as Downtown: five objects must be delivered in soda-machine form, this time with one square upstairs and four downstairs in the corners.
Starting objects are randomized again, so the brute-force method works best: carry each object and walk diagonally across the intersecting floor lines until it converts into a soda machine, then set it in its yellow square. After all five are placed (one upstairs, four downstairs), flip the switch by the computer icon and take the Power Upgrade crate from the unlocked corner door.
4. Testing Facility 4 — West Incursion Zone
The West Incursion Zone site is entered through a pipe in a construction pit along the road in the middle of the area. It uses the object-transformation puzzle once more: five objects carried to the middle squares, crossing floor lines to convert everything into soda machines. Starting forms are randomized, so walk the lines until each object converts, then place all five. Flip the switch by the computer icon and collect the Power Upgrade crate from the unlocked corner door.
5. Testing Facility 5 — The Park
For The Park facility, head to the Sewer Route area on the east side of The Park and follow the path southeast toward the site. Advance to the "lava" room, then jump to the northeast path on the same level to reach the actual testing area. The puzzle here is the charge-core type, like Central but with five cores instead of four — the method is identical. Start the 60-second timer, keep shuttling charges from blinking blue spots to blinking red spots so nothing overloads (each spot allows roughly 15 seconds), and last the full minute until the stations turn green. Flip the switch by the computer icon and collect the Power Upgrade crate from the unlocked corner door.
6. Testing Facility 6 — The Unknown
The last facility is entered through a pipe in a construction pit on the "ground" section of The Unknown, west of the Twisted Rooftops fast travel door. It is another charge-core puzzle with five cores, solved exactly like The Park site: run the 60-second timer, move charges from blinking blue to blinking red spots, survive until everything turns green, then flip the switch by the computer icon. The unlocked door here sits to the left of the switch, and it holds the Power Upgrade crate.
Final Objective — Go Into the Threshold
Once all six test sites are deactivated, one last objective appears. If the Unknown site was not the last one finished, fast travel back to it. Inside the room with the Power Upgrade crate, interact with the switch to open the door ahead, then follow the path straight to its dead end. Pick up the recording beside the dead body there — this completes the mission. (Other accounts of the threshold area describe transformation paths and a dead Power Core at the end, with Dr. Grant's Final Report, the Untapped Scrunchie artifact recipe, and the Threshold Researcher trophy waiting at the finish.)
Rewards
Every facility pays out the same site reward: 120 Area XP, 1 x Undefined Reading, and 1 x Power Upgrade Point from the crate in the unlocked room. Completing the mission itself grants the Untapped Scrunchie artifact, and finishing this quest counts as one of the three side quests required for the Threshold Researcher trophy. Like all side quests in the game, nothing here is missable — anything left behind can be finished in post-story free-roam.