Malta
Malta is a Knights of the Mediterranean random map. Players begin in walled cities near capturable Fixed Guns, and a large mountain range blocks early direct attacks but can be breached for a faster approach. Water control matters for protecting landing areas. Bourbon, Hanover and Phanar settlements and Inquisitor and Sailor outlaws add neutral choices.
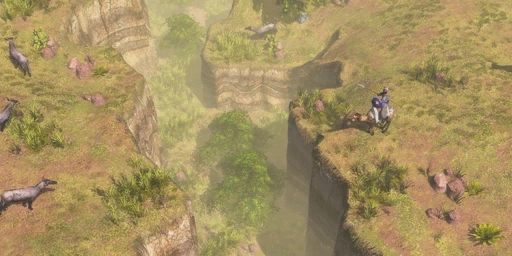
Terrain, routes and neutral sites
- Starts
- Walled cities near capturable Fixed Guns
- Terrain
- Large mountain range can be breached; eastern passage offers another approach
- Royal Houses
- Bourbon · Hanover · Phanar
- Outlaws
- Inquisitor · Sailor
Map character
Secure the starting position, then scout the nearest Fixed Gun, the mountain approaches and the narrow passage in the far east. Capturing a nearby gun strengthens the defense against invaders; controlling the water helps protect the landing sites. Check which Royal House settlement and outlaw camps are safely reachable before committing Villagers.
What to scout
Use the map’s forts and terrain to decide whether to hold a defensive line or prepare a coastal attack. Do not assume the mountain range is impassable: it can be cut through, and the eastern passage can allow a surprise approach. Protect the Fixed Guns and landing areas your army needs, and distinguish this random map from the Malta campaign missions and the Maltese civilization.
Capture Fixed Guns to reinforce the walled starts
The starting cities are walled and have nearby Fixed Guns that can be captured. These guns are a map objective with immediate defensive value: secure them before an opponent can use the approach to pressure the city, and keep troops nearby to discourage a counter-capture. Check the gun’s position relative to the wall and the routes into the settlement; a captured weapon protects only the ground it can cover. The Fixed Gun entry explains the structure’s normal role, while Malta’s special capture setup comes from this map. Do not assume every Fixed Gun is already under player control at the start.
Choose between the mountain cut and the sea landing
A large mountain range blocks early attacks, but the terrain can be cut through to create a direct approach. The far-eastern narrow passage is another route that can support a surprise attack. Scout these paths before moving the main force so the defender knows where a breach or flank could appear. At the same time, water dominance helps secure the landing areas: check the coastline and protect ships and troops during a crossing. Land and sea routes create different timing windows, so use one to distract or pin the defense while the army advances through a route it can reinforce.
Plan around the Royal Houses and outlaw camps
Bourbon, Hanover and Phanar settlements are listed as alliance options, while Inquisitor and Sailor are the available outlaws. Scout their actual locations and compare the settlement roster with the army you intend to field. A Trading Post that lies beyond the mountain or across exposed water needs a protected route; do not let neutral recruitment pull the whole force away from the city defenses. Outlaw access is a separate choice from a Royal House alliance. Keep enough troops to hold the Fixed Guns and landing areas while Villagers establish the one neutral position that best supports the match plan.
Use the Fixed Guns as anchors for mobile defense
A captured Fixed Gun can strengthen one approach, but it does not patrol the wall, mountain pass or coastline around it. Keep mobile units close enough to intercept an enemy attempting to retake the gun or bypass its firing position. Before splitting the army, decide which starting city and route the gun actually protects; a piece of static defense has limited value if the opponent can move through a different corridor. Treat each Fixed Gun as one part of the defensive plan, with the wall, nearby production and a reserve force covering the remaining approaches.
Sequence neutral expansion behind the front line
Bourbon, Hanover and Phanar settlements offer separate alliance options, while Inquisitor and Sailor outlaws are another form of recruitment. First scout their positions relative to the mountain routes, eastern passage and likely landing areas. Then choose one objective whose roster or technology supports the army and whose path can be defended. Sending Villagers to several distant sites at once can weaken the city and expose builders; secure the approach with troops, complete the Trading Post investment and return the army to a position where it can answer an attack.
Make an attack force the defender to divide attention
The mountain cut, far-eastern passage and coastal landing create different ways to approach a walled start. Scout the route before committing siege or a transport, then keep enough force to protect the chosen path as reinforcements arrive. A small feint can draw defenders away from a Fixed Gun or landing zone, but do not divide the main army into groups that can be defeated separately. If the defender shifts to cover a breach, use the opening to secure a neutral site or protect workers; if the landing becomes contested, preserve the ships and regroup rather than feeding units into a defended shore.