The Deluge
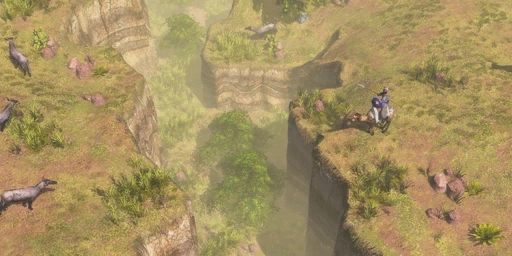
The Deluge represents the 1655–1660 invasion and devastation of the Polish–Lithuanian Commonwealth. In the Historical Map, steppes and temperate woodlands are divided by a single Trade Route, and teams start on the north and south sides.
Historical setting & objective
The objective is to defeat the opposing team. The southern side must account for early cavalry aggression, while the Trade Route creates a focal point between the separated terrain. Scout the route and keep units near the approach that the opponent can exploit.
Map control & approach
The southern team should prepare an early answer to cavalry before sending the army away from its position. The opposing side can use mobility to pressure the route, but must avoid overextending beyond reinforcement range. Control the central connection without sacrificing the army needed to finish the match.
North–south team positions and the Trade Route
The map’s division between steppes and temperate woodlands, together with its single Trade Route, gives each team a clear connection to contest. The southern side must prepare for early cavalry pressure; leaving its starting area without a mobile response risks losing control before reinforcements arrive. The opposing side can exploit mobility, but an advance along the route can become vulnerable if the rest of the army cannot follow. Scout the central approach, watch where cavalry can reach exposed units, and keep production close enough to the active front. Because the objective is to defeat the opposing team, the Trade Route is a focal point rather than a substitute victory condition. Use it to shape contact, then commit to a coordinated fight that the team can sustain.
Turn the central route into a team plan
A single Trade Route divides the northern and southern starts, making its approaches a natural point of contact even though the stated goal is to defeat the opposing team. The southern side must prepare for early cavalry pressure before moving its full force away from the start. The northern side can use mobility to threaten the route, but an overextended raid may be cut off from reinforcements. Scout the central connection and decide whether to defend it, pressure it or use it to draw the opponent into a fight. Keep production and reinforcements close enough to the active front, and coordinate with teammates before splitting across the steppe and woodland terrain. Control of the route helps shape engagements; it does not replace the army needed to finish the match.
Team roles, starting resources and Industrial limit
The map’s objective is to defeat the opposing team. Players are divided between north and south across steppes and temperate woodlands, with one Trade Route through the center; the southern side must account for early cavalry pressure. Defending players begin with 500 additional Food. Attacking players receive 1,000 Food, 500 Wood, 500 Coin and a Trading Post Wagon, and begin with a Command Post instead of a Town Center. Under recommended settings, the map is restricted to the Industrial Age. Building an Outlaw Trading Post on the central route can unlock special technologies and Outlaw training, giving the route military and economic value beyond Experience. These asymmetric start packages mean that the two sides should not use identical openings: defenders need an early answer to cavalry and protected resources, while attackers can spend their extra supplies on a coordinated route push. Check the lobby rules for age limits before planning a later-game composition.