The Great Turkish War
The Great Turkish War is a team-based Historical Map built around a city surrounded by woodland and natural resources. One team defends the city while the other attacks it.
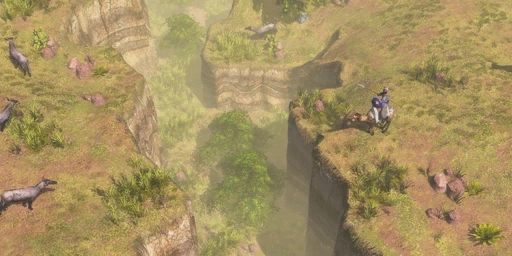
Historical setting & objective
The defending team should use the available resources and terrain to sustain the city’s protection. The attackers need to coordinate an approach through the surrounding ground and bring enough force to overcome the defense, rather than feeding units into the city one at a time.
Map control & approach
For defenders, preserve the city and keep a reserve for the approach that is under pressure. For attackers, scout the woodland and resource areas for a workable route, then time the assault so siege and frontline units arrive together.
Planning the assault or the defense
The city is the center of an asymmetrical team fight, with woodland and natural resources shaping the routes around it. Defenders should spend attention on keeping the city protected and sustaining the force that holds its approaches. Attackers should scout the surrounding ground and select an approach their siege and frontline can use together. A series of unsupported attacks gives the defense time to recover; assemble enough force for a coordinated push and protect the units needed to break through. The defending team should keep a reserve rather than committing every unit to the first visible threat. The map is a scenario about assaulting or defending the city, so ordinary expansion plans matter only insofar as they support that central task.
Use the surrounding terrain to shape the siege
The city is surrounded by woodland and natural resources, so the attacker should scout more than one route before committing the whole army to a narrow approach. The defender can use the city and available terrain to protect its force, but must keep a reserve for a second line of pressure. Attackers should assemble siege and frontline units together; sending either group alone gives the defense an opportunity to remove it before the assault develops. Where resources can support a prolonged defense, the attacking team should coordinate pressure rather than wait for a perfect single attack. A successful push needs enough surviving units to hold the ground it takes. For defenders, preserve the city’s protection and avoid pursuing attackers so far that the central position becomes exposed.
Defending and attacking the Command Post
The allowed civilizations are Germans, Italians, Maltese, Ottomans, Russians and Spanish. The timer sets the roles: defenders must protect the city Headquarters, while attackers must destroy it. The objective text also refers to the target as a Command Post, so identify the marked city objective in the briefing. City districts provide team bonuses and powerful Fixed Guns protect the urban approaches. Attacking players begin with a Command Post and Supply Cache inside a fortified base, with 1,000 Food and 500 Coin; the cache produces resources and the Command Post can train Military Wagons for faster structure placement. Defenders begin with a Town Center and Headquarters inside the city, whose buildings provide a steady resource trickle. These rules explain why a direct uncoordinated rush can fail: attackers need to establish production and use the siege support, while defenders should preserve the Command Post and the districts that sustain the team. Use the in-game map briefing for the exact district effects and current settings.
Attacker and defender have different win conditions
This Historical Map divides the match into a city defense and an assault. The defenders must preserve the city Headquarters until the objective timer is met; the attacking side must destroy the marked city objective. The map briefing identifies the exact target, so check whether it labels the target Command Post or Headquarters before committing siege units. The city is surrounded by woodland and natural resources, which make the approaches and resource routes part of the fight. Defenders should use the protected position to hold an approach and preserve access to resources rather than chase attackers beyond supporting range. Attackers need a screen for their siege force and enough units to stop the defense from removing it before the structure takes damage.
Coordinate a siege that can hold the ground it takes
The attackers should bring their frontline and siege together: siege units sent ahead can be intercepted, while infantry without siege may be unable to finish the objective. Scout the woodland approaches and use more than one path only if the team can reinforce both. Defenders can delay the assault by contesting the route and protecting the city’s key structures, but should keep a reserve near the objective in case a feint becomes the main push. Once the objective is under attack, time and repair or reinforcement windows matter more than chasing distant units. Resource availability around the city can sustain a prolonged defense, so attackers should coordinate pressure and prevent defenders from freely rebuilding the field army. Follow the selected scenario’s exact timer, starting resources and team sizes rather than applying a standard-map build order.
Use the objective timer to plan the final engagement
Defenders should make the attacker spend time clearing the approach while keeping the Headquarters protected. Attackers should begin the siege only when enough troops can hold back the defending army; a damaged objective is not progress if the siege group is immediately lost. Check the selected rules for the timer and objective marker before choosing a final push.