Faroe Islands
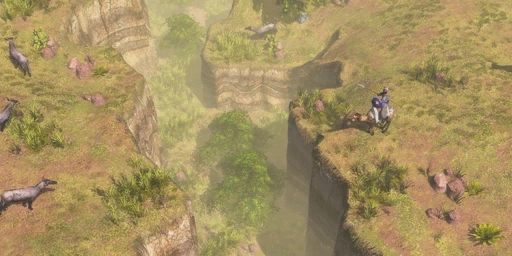
Faroe Islands is a cliff-bound island map where naval passages connect separated starting areas. Harpooner and Sailor outlaws are listed, and no Native settlement is available. Narrow land approaches and usable shorelines shape how armies can meet.
Terrain, routes and neutral sites
- Map character
- Cliff-bound island map
- Naval routes
- Channels connect separated starts
- Native settlements
- None listed
Map character
Scout the coastline and identify each channel and landing point before choosing a Dock or forward position. Since there is no Native site to claim, compare the cost of naval access with ordinary land production and any Trade Route shown in the actual generation.
What to scout
Keep a compact force near the narrow approaches so it can respond to a landing. Commit to naval control only if the channel and coast create a useful route; otherwise secure safe land resources and defend the exposed shoreline.
A naval passage is a route that needs both ends
Faroe Islands separates starting areas with naval passages and confines land movement with cliffs. Before investing in ships, scout the channel and identify a usable departure point and a safe place for troops to land. A crossing is useful only when the army can arrive together and hold the far shore until reinforcements follow. Transporting units one by one risks losing them before the force can defend itself. If the passage is not practical, secure the land approaches and nearby resources first rather than treating naval control as an automatic win condition.
Defend the beach and cliff approaches together
A defender must account for both the narrow paths on land and the places an opponent could use to come ashore. Keep the main force near the approach that connects to the base, with enough mobility to respond if the enemy chooses another landing. Do not spread small groups across every cliff: a concentrated force can protect a specific route while the Explorer checks the rest of the coastline. Harpooner and Sailor outlaws can add recruitment options, but no Native settlement is listed, so do not reserve resources for a Native alliance that the map does not provide.
Read generated sites before building forward
The map’s narrow geography makes an exposed Trading Post or forward building difficult to rescue. Scout whether a Trade Route is present in the current generation and whether a proposed post can be reinforced from the starting position. If a site lies beyond the channel, hold the crossing first; if it is reachable on land, protect the cliff approach and leave a reserve near the economy. Naval units are valuable when they open or deny a real route, but the army still needs a safe path between production, the shoreline and the objective.
Harpooner and Sailor fill different coastal roles
The map lists Harpooner and Sailor as outlaw choices, but they should not be treated as interchangeable. A Harpooner costs 120 Coin, takes 40 seconds to train and uses 4 population. Its 20-damage ranged attack reaches range 14 and deals double damage to Cavalry and Shock troops, while its 210 hit points and separate siege attack let it support a land force near a channel. A Sailor costs 100 Coin, takes 28 seconds and uses 3 population; it has 190 hit points, a 15-damage ranged attack at range 12 and a 22-damage siege attack. It can also repair ships within range 16. If an enemy force threatens a crossing with cavalry, the Harpooner’s range and multipliers can help hold the approach. If ships are central to the plan, the Sailor’s repair ability can preserve naval investment. Check each unit’s full availability rules before budgeting, because outlaw access depends on civilization and the relevant recruitment building.
Recruit for the landing plan, not simply because a camp is nearby
Outlaw recruitment competes with the resources needed for a Dock, transport, ordinary units and a defended route to the coast. Decide first whether the army needs a ranged anti-cavalry unit or ship support, then compare that need with the outlaw’s Coin and population cost. A Harpooner is a slower, four-population commitment; do not let it replace mobile units needed to respond to a landing. A Sailor is cheaper in population and time, but its ship repair matters only while friendly vessels can stay in range and survive. Reveal the camp and both ends of the channel before sending a force away from the base. Neutral recruitment should reinforce a route the army can use, not become a separate objective with no safe return.
Cliff starts and naval passages
The map record identifies Faroe as a layout where players spawn on narrow, confined cliffs separated by naval passages. The coastline is therefore part of the route network: a land army may be constrained by cliff edges while ships provide access between separated positions. The exact channels and landing points should still be checked in the current generation; the map description does not guarantee that every water route is equally safe or useful. Reveal both sides of a passage before committing a Dock, a transport or a forward base, and keep a land force able to defend the beach where units arrive.
Neutral options and the first naval commitment
No Native settlement is listed for Faroe, while Harpooner and Sailor are the recorded outlaw choices. Players should therefore compare outlaw recruitment with the resources needed for ships and normal production instead of planning around a Native Trading Post. A Harpooner can deter cavalry at an approach, while a Sailor can repair nearby ships; either only helps if the route can be defended and its Coin and population cost does not weaken the main army. Identify a useful passage first, secure the coast around it, and then choose whether the match rewards naval access or a tighter land defense.