The Burning of USS Philadelphia
The Burning of USS Philadelphia is the tenth Historical Battle in Age of Empires III: Definitive Edition and launched with the Mexicans DLC. Command Stephen Decatur’s United States volunteers in a harbor operation: capture the corsair Mastico, reach the captured frigate USS Philadelphia, load explosives, then escort Mastico back to the friendly frigates. The mission combines naval combat, guarded landings, optional rescue and a sustained defense phase.
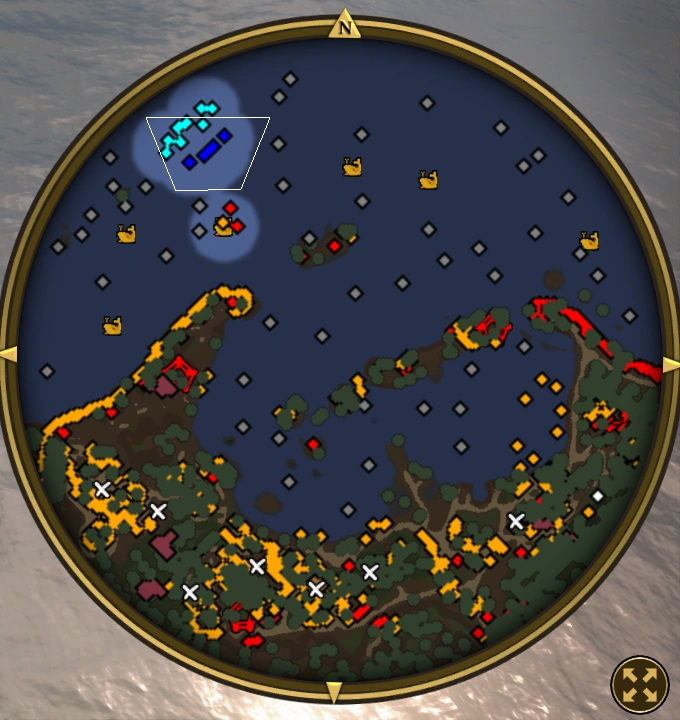
Scenario profile
- Starting Age
- Fortress Age
- Population cap
- 60
- Starting naval units
- 2 Sloops · 2 Rowboats
- Starting land force
- 12 Marines
- Commander
- Stephen Decatur
- Primary extraction
- Return Mastico to friendly frigates at the harbor entrance
- Optional objectives
- Rescue the crew · capture the Fixed Gun · destroy the eastern Barbary fleet
Primary objective and mission flow
The primary objective is a five-step sequence: defeat Mastico’s escort and capture it; seize the harbor entrance Outpost by eliminating its guards; bring Mastico to the USS Philadelphia and clear the frigate guards; defend the corsair while explosives are loaded; and return Mastico to the friendly frigates at the harbor entrance. Optional objectives are to rescue the Philadelphia’s crew, capture a Fixed Gun to open a faster route, and destroy the Barbary fleet docked to the east. Destroying the target is not the final step: Mastico must survive and reach the extraction point.
Deck, defense and extraction
Single-player Historical Battle · Fortress Age · 250 Wood · no starting Food or Coin · population cap 60 · two Sloops · two Rowboats · twelve Marines · United States volunteers led by Stephen Decatur.
Opening force and map approach
Treat the battle as an extraction mission. Preserve the starting ships and Marines through the opening, use Rowboats and shoreline routes to reduce losses, and complete useful optional tasks before triggering the sustained defense around the explosives. Keep a force available to protect the Docks and a naval escort for Mastico’s return. The mission has a restricted United States roster and Home City deck; ordinary multiplayer United States access and economy do not define this scenario.
Mission sequence and commitment point
Begin by destroying the Privateers escorting Mastico, then capture the corsair. Next clear the guards at the harbor entrance Outpost. Move Mastico through the harbor to the USS Philadelphia, remove the frigate guards and hold the area while explosives are loaded. This starts the demanding defense against repeated pirate attacks. When the loading objective is complete, the final order is to bring Mastico back to the friendly frigates at the entrance. Reaching the Philadelphia and preparing it for demolition does not satisfy the full objective; preserve the corsair and the route needed for its return. The transition into the loading defense is the mission’s main commitment point, so prepare ships, land troops and side objectives before starting it when possible.
Capture Mastico and clear the opening approach
Use the two Sloops to engage the escort carefully. Focus fire on one Privateer at a time and avoid trading away so much health that Mastico or the surviving fleet cannot complete the later harbor movement. After capturing the corsair, use the Rowboats’ range to weaken island defenders before landing Marines. Where an explosive store can safely damage a group of pirates, draw them toward it while keeping friendly troops outside the blast. Once the shore is manageable, land the Marines and remove the guards at the entrance Outpost. Rowboats are especially useful in this opening island phase and become unavailable later in the mission, so use their range and transport value before moving on; preserve at least one if the current objective path allows it. Do not spend the limited opening force attacking Tripoli buildings in the southeast: those structures are scenery, while the hostile Tripoli Pirates and mission routes are the active concerns.
Rescue the crew and take the optional route
The imprisoned USS Philadelphia crew is guarded on shore. Clear the defenders and destroy the Stockades holding them to complete the rescue objective and recover the mission’s released troops. The Fixed Gun objective opens a shorter route toward the target; capturing it can reduce exposure and travel through the harbor. The eastern docked Barbary fleet is another optional target and can reduce pressure from that direction. These tasks are easier to plan before the loading defense begins, because the later waves force the same Marines and ships to divide their attention between the Docks, the corsair and incoming enemies. Use Decatur and the Marine force to clear a landing, but avoid losing the whole ground force while pursuing a side objective. Take optional rewards that support the final defense without delaying or endangering the required ship sequence.
Prepare before loading the explosives
Before clearing the Philadelphia guards and activating the long defense, finish the crew rescue, capture the Fixed Gun and attack the eastern fleet if those objectives fit the run. Move ships into positions where they can support the Docks and the channel, and leave Marines or other available troops ready to protect the loading area. The defense pressure can become continuous, so a force sent far across the map may not return in time. Keep Mastico out of unnecessary combat and do not leave it exposed while the landing force is clearing shore targets. US Navy vessels shown in the scenario provide tactical and historical context; do not plan around them independently fighting the pirate waves. The troops released through the rescue, the player’s fleet and the restricted shipment deck are the resources to organize.
Restricted Home City cards and reinforcement choices
This battle uses a scenario-specific United States Home City deck, not the full multiplayer deck. Recorded early choices include one or three Rowboats, six Marines and five Regulars. Long Rifles adds four to State Militia and Marine sight and ranged attack, and makes Sharpshooters available in the Commerce Age. Overseas Weapon Shipments upgrades Regulars and Sharpshooters to Guard. TEAM Improved Oars raises Rowboat speed by 20 percent. Later listed choices include two Sloops, eight Regulars, seven Sharpshooters and Marine Volunteers. Marine Volunteers sends one Marine for each shipment already sent, counting its own shipment. Reinforcement timing should answer the phase ahead: choose boats when the corsair or route needs naval cover, and choose troops when guarded shore positions or the loading defense need more land strength. Because the opening has no Food or Coin and a population limit of 60, protect the initial force and check the actual scenario shipment choices before building a plan around ordinary skirmish access.
Hold the harbor during the loading defense
Once the explosives are being loaded, the mission shifts from clearing a route to keeping the corsair and harbor position safe through repeated attacks. Keep Mastico protected and avoid sending it ahead without an escort while hostile ships remain. Use available Sloops and other ships to contest the channel; keep land troops near the Docks and approaches where they can respond to pirate landings. Preserve population by using Rowboat range and ship fire to weaken defenders before Marines engage. If the eastern fleet remains active, account for its pressure rather than splitting every ship across the map. Do not divert the entire force to distant optional combat after starting the defense. The useful division is a shore force that holds the loading area and a naval group that can protect Mastico and the return route.
Return Mastico to the friendly frigates
After the Philadelphia is prepared and the required defense is complete, escort Mastico back to the frigates at the harbor entrance. Clear the channel before moving the corsair, keep Marines and available ships between it and enemy Galleys, and use the Fixed Gun route if captured. Prioritize threats that can sink or recapture Mastico over distant enemies that do not block extraction. The friendly frigates mark the required destination, not merely a safe place to end combat. Keep the captured ship with its escort throughout the withdrawal and do not leave the mission-critical vessel unattended while troops pursue a separate fight.
Historical setting and scenario-specific rules
The mission is set during the First Barbary War and depicts Stephen Decatur’s raid to deny the captured American frigate to the forces holding Tripoli. The scenario labels the operation 1803, while the historical burning of USS Philadelphia took place in February 1804; the battle is also known as the Second Battle of Tripoli Harbor. The mission simplifies the historical operation into capture, harbor entry, demolition and withdrawal, with optional crew-rescue and defense objectives. Its starting resources, population cap, naval force and restricted shipment list are scenario rules, not standard United States civilization statistics. Keep those conditions separate when comparing this Historical Battle with Supremacy or another mission.
Use the naval units for distinct jobs
The starting Sloops are the ships to contest Mastico’s Privateer escort and later protect the harbor lane. Concentrate their fire instead of dividing damage, and preserve enough health for the approach to the Philadelphia and the withdrawal. Rowboats serve another purpose: use their range to pressure shore defenders, probe landing points and move Marines without exposing them immediately to the whole island force. Their value is greatest before the mission moves beyond the opening island section, where they become unavailable. Avoid sending both Sloops after distant ships while Mastico is exposed; the corsair is the required objective vessel and must survive the full route. Each movement trades immediate threat removal against retaining an escort for later.
Choose landing points and clear defenders in stages
Approach guarded shores with ship or Rowboat support before landing the twelve starting Marines. Use the boats to draw defenders into a fight where Marines can join safely, and trigger explosive stores only when friendly troops are clear and the blast can help against nearby pirates. Capture the entrance Outpost after removing its guards; it is required, so do not bypass it for scenery or distant targets. The Stockades holding the imprisoned crew are also functional mission objectives: clear their guards and destroy the structures to complete the rescue. Keep enough Marines for the next required landing instead of committing the whole group to an optional task. Decatur can accompany the ground force, but surviving troops are still needed to clear fixed defenses and protect the loading area.
Plan Home City shipments around the next phase
The battle begins with no Food or Coin and a population cap of 60, so the restricted Home City deck is central to reinforcement planning. Rowboat options support shoreline work or the eastern dock objective; Sloop shipments help replace naval losses and escort Mastico. Marines, Regulars and Sharpshooters support landings and defense. Long Rifles adds four to State Militia and Marine sight and ranged attack and makes Sharpshooters available in the Commerce Age; Overseas Weapon Shipments upgrades Regulars and Sharpshooters to Guard. TEAM Improved Oars raises Rowboat speed by 20 percent. Marine Volunteers sends one Marine for every shipment already sent, including itself. Choose reinforcements for the coming phase: boats when the corsair needs naval cover, troops when guarded shore positions or the loading defense need land strength. Send the shipment before the harbor is under pressure, when possible.
Keep the loading area and exit route supplied
Before the timed attack begins, leave troops close enough to protect the Docks and position the fleet to contest the entrance channel. Do not move every Marine to a distant rescue or gun position and leave the loading area undefended. During the assault, use land troops against shore threats and ships against vessels approaching Mastico; this avoids forcing the captured corsair into unnecessary exchanges. If the eastern Barbary fleet remains active, reserve attention for its approach instead of assuming the route is clear. After the defense, regroup at the loading area, check that Mastico is safe, and move the escort together toward the friendly frigates. Extraction is a separate required objective, so retain naval strength for the channel rather than ending the plan when the Philadelphia is prepared.
Read the objectives as separate mission phases
The objective sequence changes what deserves attention at each point. During the opening, capturing Mastico and securing the entrance Outpost create access to the harbor. The approach phase then focuses on reaching the Philadelphia and removing its guards. Loading explosives changes the battle into a defense: the player must keep the Docks and corsair safe while attacks arrive. Only after this phase does the mission become an extraction, with Mastico moving back through the harbor to the friendly frigates. Treating these as distinct phases prevents a common planning error: spending the fleet and Marines on optional targets, then discovering that the ship needed for the final objective has no escort. Optional objectives can improve the position, but they do not replace any of the required transitions. Recheck the objective panel after each major action so the force moves toward the current task rather than continuing to fight an already-cleared area.
Coordinate the landing force with the fleet
The Marines and ships solve different parts of the operation. Ground troops can clear the entrance Outpost, guard the Philadelphia and destroy the Stockades, while ships can engage Privateers, pressure coastal defenders and protect Mastico in the channel. Keep the two groups close enough to support each other at required landings: a ship that is already across the harbor cannot cover Marines who are still approaching shore, and Marines left inland cannot protect a corsair from enemy vessels. Before advancing, identify which force is responsible for the next objective and leave the other in a position where it can respond. This coordination matters most after the loading defense begins, when splitting the limited starting population across widely separated fights can leave the essential harbor position weak.