Bering Strait
Bering Strait divides the teams with a partially frozen passage. The Inuit settlement and Harpooner and Qivittoq outlaws provide neutral objectives, but the central tactical question is how the current shoreline connects: ice may allow a land crossing, open water may require naval access, and both routes can matter at once.
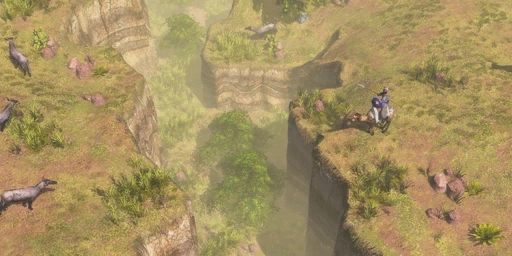
Terrain, routes and neutral sites
- Passage
- Partially frozen divide between the teams
- Native settlement
- Inuit
- Route choice
- Walkable ice and open water create different crossing options
Map character
Reveal both banks and the full passage before moving the main army. Check where the ice is walkable, where open water interrupts it and which shore offers a safe route to the opponent. Commit to a Dock, Trading Post or transport only when it supports a crossing your force can protect.
What to scout
Use a small scout to test the route, then keep a reserve on the bank most exposed to attack. Reinforcements can arrive slowly across the divide, so do not split the army before finding a reliable crossing.
Practical direction
Bering Strait rewards reconnaissance of both terrain and timing: a visible land connection is useful only if units can cross together and the far side can be reinforced.
Treat ice and open water as different routes
The partially frozen passage can look like one continuous shortcut while still containing open water that blocks land units. Reveal where ice connects the banks and where a channel interrupts movement. A Transport Ship can offer another route only if it can reach a safe landing and the army can protect the vessel. Test the path with a small group before sending siege or the full force, and keep vision on both shores so the opponent cannot cross unnoticed.
Use the Inuit site without abandoning the crossing
The Inuit settlement and Harpooner and Qivittoq outlaw options create useful neutral choices, but they sit alongside the map’s main challenge rather than removing it. Choose a settlement only if the Trading Post can be defended from the bank and can receive reinforcements. Outlaw recruitment may add a unit without requiring the same alliance plan, depending on civilization access. Do not spend so much on neutral control that the crossing is left without an army.
Stage armies to avoid isolated arrivals
A strait can turn a numerically strong force into two smaller groups if units cross at different times. Gather the crossing force, identify the landing area and keep reinforcements ready before committing. A small defense on the home bank can prevent a counter-crossing while the main group moves. If the enemy already holds the far shore, use scouting and production to create a supported approach instead of feeding units one at a time across exposed ice or water.
The Inuit alliance has an early and a later timing
The Inuit settlement offers an option before and after the crossing plan develops. In The Baltic Powers, the Commerce Age Inuit Hunter costs 60 Food and 50 Wood, takes 30 seconds to train and has 130 hit points with 20% ranged resistance. Its bonuses against Pets, Mercenaries, Outlaws and Native warriors make it a specialist choice when those targets are present; evaluate the enemy roster before using it as the main line unit. The Fortress Age Inuit Qamutik costs 110 Food and 110 Wood, has 420 hit points, moves at 7.25 speed and attacks at range 14 for 15 damage. It adds a 15-damage siege attack at range 10. That later unit can accompany a mobile force or pressure buildings, but the age and resource cost mean the player still needs a practical way to secure the strait first.
Test the route with a small force before moving siege
The partially frozen passage can contain walkable ice beside open water, so a route that looks continuous may not carry land units across. Send the Explorer or a small group to confirm the actual connection and check whether the far bank has room to assemble. Do not send slow siege or the whole army until the approach is known. If a Transport Ship is needed, inspect the shoreline for a reachable landing and ensure ships can approach without passing an unprotected enemy position. A crossing is only reliable when the first group and its reinforcements can follow the same route.
Balance neutral control against holding both banks
The Inuit settlement and the Harpooner and Qivittoq outlaw options give the teams reasons to move away from their starting shore. Choose one neutral objective that the army can reach and defend rather than dividing into several isolated groups. A forward Trading Post is exposed if it lies near an enemy landing, and a captured site cannot reinforce a force that is already stranded beyond the ice. Keep enough units at home to respond to a counter-crossing, then move the main force only after vision confirms that the far bank can be held. If the enemy reaches the crossing first, use ranged pressure and local production to contest the approach instead of sending small reinforcements one by one.