Iceland
Iceland places teams on opposite sides of a large central volcano. An Oldenburg settlement and Harpooner and Sailor outlaws provide neutral objectives, while a broad treasure pool includes resources, experience and claimable or repairable objects guarded by different forces.
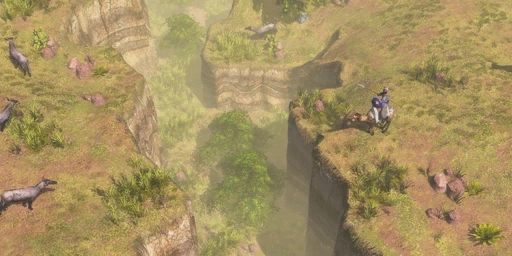
Terrain, routes and neutral sites
- Map character
- Teams start on opposite sides of a central volcano
- Royal House
- Oldenburg
- Treasure
- Mixed resource, Experience and claimable-object rewards
Map character
Use the Explorer to find safe paths around the volcano and inspect treasure guardians before engaging. Check the Oldenburg site and coastal access, then choose whether the reward or alliance justifies the route and resources required.
What to scout
Prioritize nearby treasure that can be collected without losing the Explorer or delaying the economy. Keep Villagers away from exposed central approaches until the terrain is scouted, and treat each guarded reward according to its actual defenders.
Evaluate treasure by reward and guardian cost
Iceland has an unusually broad treasure selection: rewards can include resources, Experience, units or settlers, and claimable or repairable objects. The value of a camp therefore depends on both what it gives and what guards it. Use the Explorer to reveal a group, inspect the guardians, and decide whether the expected reward justifies the time and damage needed to claim it. A resource or Experience reward can help the opening, while a difficult camp may delay Villager production or leave the Explorer exposed. Take nearby manageable treasures first, then revisit harder sites when the army can support the fight. Do not assume that every treasure group offers the same reward or defenders.
Route around the volcano before committing workers
The central volcano separates the teams and shapes the approaches between their bases. Explore the available paths around it before moving Villagers toward distant resources or the Oldenburg settlement. A short line on the minimap may lead through a route that is exposed or difficult to reinforce; establish where the main army can travel before placing a forward Trading Post. Harpooner and Sailor outlaws add recruitment choices, but reaching them can compete with treasure collection and alliance control for the Explorer’s time. Keep nearby gathering safe while the Explorer investigates, then choose one objective your force can reach and hold. This sequencing protects the economy while turning the map’s unusual center into a known boundary rather than a surprise during an attack.
Match treasure rewards to the next milestone
The reward type can change which treasure is worth pursuing first. Resources help pay for immediate production or age advancement, while Experience moves the Home City shipment track and can be valuable when a needed card is close to unlocking. Guarded units or settlers can strengthen the force, and a claimable or repairable object may provide a local asset if the player can reach and hold it. Check each camp instead of treating every treasure as an interchangeable bonus. The best early target is often the one whose reward arrives safely and supports the next decision; a difficult camp is a poor trade if its guardians delay production or cost the Explorer.
Oldenburg can turn safe hunts into a second resource
The Oldenburg settlement offers a Commerce Age Royal Huntsman for 140 Food. It has 150 hit points, 30% ranged resistance and speed 4.5; its attack deals 10 damage at range 2–12, with bonuses against Light Infantry and counter-skirmishers. It can also gather Food from huntable animals, so it is an economic unit that can help protect or use a hunting area. Hunting Expeditions costs 300 Food and 300 Wood, researches in 30 seconds and lets Villagers and Fishing Boats or Fishing Canoes gather Coin equal to 10% of their Food rate while hunting or fishing. Use the Explorer to locate safe hunts around the central volcano before sending workers across a narrow path. The technology is valuable only while those workers or boats can keep gathering; if the opponent can cut the route, spend on a safer army or local production first.
Pick an outlaw for the route you actually need to defend
Harpooner and Sailor recruitment support different parts of an Icelandic plan. A Harpooner costs 120 Coin and 4 population, trains in 40 seconds, has 210 hit points and attacks at range 14 for 20 damage. Its ranged and hand attacks deal double damage to Cavalry and Shock troops, so it can help hold a land approach but is too slow to chase threats far around the volcano. A Sailor costs 100 Coin and 3 population, takes 28 seconds and has 190 hit points. Its 15-damage ranged attack reaches range 12, and it can repair ships within range 16. If the coast and a Dock support transport or fishing, a Sailor can help preserve that investment; if the main threat is a cavalry push through a land passage, a supported Harpooner is more direct. Both options consume resources needed elsewhere, so locate the outlaw access and landing route before committing.
Coordinate treasure collection with the volcano crossing
The central volcano can make a Treasure look close while leaving its approach difficult to reinforce. Send the Explorer ahead, inspect each Treasure guardian and note a retreat route before starting a fight. A surviving Explorer can collect Experience and keep the opponent’s movement visible while the army decides whether to claim Oldenburg or an outlaw camp. Avoid sending Villagers on the same narrow route as the main force unless the settlement or treasure is worth contesting. If the passage is unsafe, secure the nearer resources and build the force that can reopen it instead of losing the Explorer and delaying the economy.