South Norway
South Norway uses mountains and fjords as terrain features and includes Oldenburg and Sámi settlements, plus Harpooner and Sailor outlaws. Narrow inlets and mountain approaches can make resource-rich positions difficult to reach or defend.
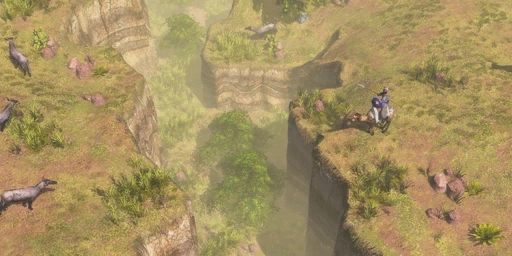
Terrain, routes and neutral sites
- Terrain
- Mountains and fjords
- Settlements
- Oldenburg · Sámi
- Planning point
- Scout fjord edges and mountain passages
Map character
Scout fjord edges and mountain passages before choosing a Trading Post or forward production site. Compare Oldenburg and Sámi benefits and identify a reinforcement route that does not leave the Town Center open.
What to scout
Use the terrain to control approaches, but do not split the army before confirming which passages connect. Expand toward a distant resource only when the route and settlement can be held.
Read the terrain as a network of routes
South Norway’s fjords and mountains create detours between positions that may look close on the minimap. The map description also points to resources and opportunities around this terrain, so a difficult approach can lead to a useful expansion rather than just empty ground. Scout both the intended destination and the route back to the Town Center before sending Villagers. Mark the passages a force can actually use, then keep a small reserve close enough to cover a retreat or a raid through a different inlet. A forward Trading Post or production building is most useful when reinforcements can reach it without abandoning the home economy. Avoid dividing the army between opposite sides of a fjord until the connecting paths are known.
Choose the settlement that supports the army
Oldenburg and Sámi settlements give the map two different alliance choices. Explore both when their positions are safe to reach, then compare the available units and technologies with the composition you are already preparing. The nearest site is not automatically the best investment: the cost of the Trading Post, the distance from production, and the force needed to defend its approach all matter. If neither site can be held yet, build from the resources near the base and return after scouting reveals a secure corridor. Harpooner and Sailor outlaws are separate recruitment options; weigh them against the cost of maintaining a neutral alliance rather than treating every available site as a required objective.
Keep a reserve for the route you are not using
Fjords and mountain passages can make it difficult to move the whole force quickly from one side of the map to another. After choosing an expansion corridor, leave a mobile reserve where it can answer pressure on the Town Center or cover Villagers if the opponent approaches from elsewhere. The group securing a Trading Post does not need to be the entire army: a smaller escort can hold the position while the main force remains free to respond. Revisit the route when the front shifts, since a passage that was safe during the opening may become the opponent’s quickest way to reach exposed workers.
Choose Oldenburg when hunting can support its economy
The Oldenburg alliance combines a Commerce Age unit with a food-to-Coin technology. A Royal Huntsman costs 140 Food, trains in 30 seconds and has 150 hit points with 30% ranged resistance; it deals 10 damage at range 2–12 and can gather Food from huntable animals. Its ranged bonuses are aimed at Light Infantry and counter-skirmishers, so it adds a specialist counter while workers continue hunting. Hunting Expeditions is available in the Exploration Age for 300 Food and 300 Wood, researching in 30 seconds. It lets Villagers and Fishing Boats or Fishing Canoes gather Coin equal to 10% of their Food rate while hunting or fishing. On a map of fjords and coastlines, this can turn safe hunts or protected water into a mixed-resource economy, but only if workers and boats can remain productive. Scout the actual resource sites and shoreline before paying the research cost.
Sámi provides a flexible forward worker instead
The Sámi site offers a different economic path through the Sámi Noaidi. It costs 50 Food and 100 Coin, takes 35 seconds to train and has 240 hit points with 30% ranged resistance. The unit can gather, build and claim Treasures, so it can help establish a forward position beyond a mountain passage instead of contributing only combat strength. Sámi Duodji costs 150 Coin and adds 0.7 Wood per second per Noaidi; three Noaidi would therefore add 2.1 Wood per second before other effects. That benefit depends on keeping the units alive and should not be counted if the player needs all three resources immediately for a military push. Decide whether Oldenburg’s hunt-and-fish Coin suits the available shoreline or the Sámi Noaidi better supports an exposed expansion, then defend one route through the fjords rather than stretching between both settlements.
Save later technologies for the map’s actual resource pattern
Oldenburg also provides Baltic Sea Trade, an Exploration Age technology costing 250 Food and 250 Wood that adds a small Coin trickle based on eligible War Ships and defensive buildings. This can complement an established water or fortification plan, but it does not provide meaningful income before those assets are built. Northern Musketeer is a later Oldenburg option: it costs 110 Food, becomes available in the Fortress Age and deals 22.5 ranged damage at range 14, but has 120 hit points. Reach it after the army can protect the Trading Post and the approach. On South Norway, a resource site across a fjord is useful only if the same route can bring in reinforcements; first scout both the passage and the resource, then decide whether the investment advances the economy or leaves the army divided.