Li'l Bombard
Li'l Bombard is artillery in Age of Empires III, available from the Industrial Age; obtained through Tavern (Europeans), Monastery (Asians), Saloon (Federal Americans), Palace (Africans), Lombard (Italians).
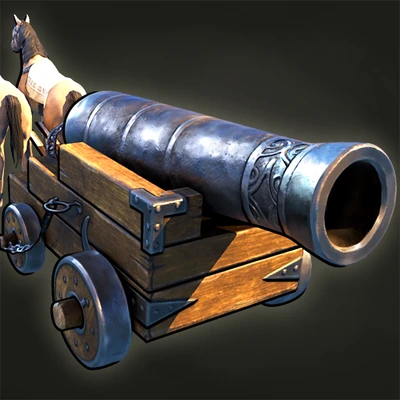
Recorded values
- Cost
- 1,100 Coin
- Available
- Industrial Age · Tavern (Europeans) ; Monastery (Asians) ; Saloon (Federal Americans) ; Palace (Africans) ; Lombard (Italians)
- Training
- 70 sec · 8 population · 120 XP per train
- Durability & mobility
- 600 hit points · 75% ranged resistance · 2.5 / 1.0 speed · 32 line of sight
- Bombard attack
- 400 base damage · range 28 · attack interval 4.0 · area of effect 4 · bonus damage: 0.75x vs. Cavalry; 0.75x vs. Shock troops; 0.5x vs. Artillery; 0.5x vs. Arrow Knight, 16
Role, availability & values
Production is available through Tavern (Europeans), Monastery (Asians), Saloon (Federal Americans), Palace (Africans), or Lombard (Italians). It has 600 hit points and 75% ranged resistance. It moves at 1.0 speed and uses 8 population. Training costs 1 and 100 Coin; it takes 70 seconds to train. Other profile values: 2.5. Attack profile: Bombard attack: 400 damage at range 28; every 4.0 seconds; area of effect 4.
Matchup & timing
Position the Li’l Bombard where its range-28, 400-damage shot can hit buildings or grouped targets, and keep Cavalry or Shock troops away from it. The area-4 bombard attack is powerful but has reduced multipliers against Cavalry and opposing Artillery. Treat this Industrial Age mercenary as a protected siege investment and assign a screen before hiring it.
Weapon profile and firing role
The Li'l Bombard’s main cannon deals 400 base damage every four seconds, with range 28 and an area of effect of four. It is a siege weapon with 75% ranged resistance and 25% siege resistance in the current Definitive Edition profile, but it is slow and occupies eight population. Its bombard-mode speed is 1.0; limber mode raises speed to 2.5 so it can reposition, at the cost of not being ready to fire. Keep it deployed only when a target is in range and protected. The large area attack punishes infantry packed into a narrow approach and can threaten buildings, ships and land units, but it is not a precise answer to a fast unit that can close from multiple angles. The cannon has a 0.5 multiplier against artillery and Arrow Knights, and current cavalry and shock-troop damage is reduced to 0.75 of base, so do not rely on its enormous number alone to remove counters.
Hiring cost, access and version changes
The standard Industrial Age hire costs 1,100 Coin and takes 70 seconds, down from 1,200 Coin and 90 seconds before update 14.43676. It has 600 hit points, line of sight 32 and trains for eight population. Europeans hire it from a Tavern, Asians from a Monastery, Federal Americans from a Saloon, Africans from a Palace and Italians from a Lombard. Access can also come from specific cards or political choices: Portuguese can unlock Tavern recruitment by selecting The Mercenary Contractor on the way to the Fortress Age, Germans can receive access through Adler von Lübeck, and United States players may encounter it through Poker’s random mercenary pool. Card and revolution access varies by civilization and edition, so verify whether a card grants the unit, unlocks local recruitment or only adds it to a random shipment.
Why it can dominate and why it cannot stand alone
A group of three can devastate infantry approaching from a predictable direction, especially after attack improvements. The four-point area makes formation spacing and attack direction important: a narrow choke can expose many units to one shot, while a broad approach reduces the value of splash damage. Its eight population and high Coin price mean each loss is costly, and its long training time makes replacement difficult. Guard the guns with heavy infantry against hand cavalry and light ranged cavalry or other mobile units against threats that can flank. Keep enough space for escorts to move around the artillery instead of blocking its retreat. Use terrain, walls or a protected firing lane to limit directions of approach, and withdraw early if the opponent can reach the guns.
Countering a Li'l Bombard
Heavy cavalry with enough durability can close the distance and survive more than one cannon shot, but the escort determines whether the charge succeeds. A screen of anti-cavalry infantry can stop a careless dive, so attack from more than one direction or clear the screen first. Culverins and Light Cannons can outrange it and trade safely when protected; artillery counters are usually more efficient than feeding ordinary infantry into its blast. Arrow Knights have greater range, but their damage against the Bombard is heavily reduced, so range alone does not make them a dependable answer. Other MercType2 units are also listed among its weaknesses. Once the escorts are distracted or removed, the slow firing piece is much easier to flank or destroy.
Damage modifiers and civilization investment
The Bombard’s damage can rise substantially through cards, technologies and allies, but its final profile depends on the civilization. The Swedish combination described for German Mercenary Contracts, upgrades, Indian and Japanese ally cards, and The Mercenary Contractor politician can raise base damage from 400 to 700. That exceptional total is not the default unit value and should not be assumed for other players. Improvements may also affect hit points, speed, range, cost or ship damage; Professional Gunners, Gunner's Quadrant and Heated Shot are examples of effects in the relevant categories. Review the available cards and ally access before investing: artillery bonuses that improve a different damage class may not offset the Bombard’s population cost or its vulnerability to dedicated artillery counters.
Choosing when to hire
Hire the unit when the Industrial Age economy can afford a large Coin commitment and the opponent’s composition gives it targets worth the delay. It is most effective when the enemy must attack across a known lane or defend a valuable static position. A forward purchase without escorts is easy to punish, and a mobile army may simply refuse the fight. If the opponent already fields cavalry, Culverins or other artillery counters, first build a screen or choose a different investment. Protecting one Bombard through several engagements can return more value than buying multiple guns that arrive separately and are defeated before joining the same force.
Version-aware numbers and damage expectations
The current reference profile includes 25% siege resistance, introduced in update 19.18309. Earlier balance notes show a 0.5 multiplier against cavalry and shock troops before update 43871; the current profile lists 0.75, while earlier values also differ for update 5208. These changes explain why an old guide may report a different result when a Bombard fires into cavalry. Its base 400 damage is still not the final amount against every target: armor, multipliers, resistance and area damage all matter. The Swedish 700-damage result is a highly invested combination, not the normal starting stat. Compare like-for-like editions and target classes when evaluating a recorded battle or build recommendation.
Field checklist
Before committing to a hire, confirm the Industrial Age access route, Coin supply and population space; then inspect the opponent’s counter units. Plan a guarded firing position, keep a retreat path open for limber mode and avoid parking the gun where enemy cavalry can surround it. In a siege, have escorts remove defenders before the Bombard advances. In defense, hold fire lanes and let its area attack punish units that must approach. If the opponent can answer with Culverins or massed cavalry, spend resources on screens or counter-artillery first. The gun is powerful when the fight is arranged around its range and splash, but its cost makes a poor engagement difficult to recover from.
Escort and firing-line priorities
An effective escort needs to protect both the artillery and its route of retreat. Heavy infantry can deter hand cavalry, while mobile ranged units can respond to artillery or a flank; neither screen should be left far enough away for the Bombard to be engaged alone. Choose a firing lane where the enemy has to approach through its area damage, then reposition between volleys only when the target has moved beyond range or the angle is unsafe. This lets the high damage matter without asking an eight-population, slow unit to chase a mobile army.
Adapt to the battle instead of the nickname
The unit’s name suggests a small novelty, but its gameplay role is serious siege artillery. Its 400-damage shot and four-radius area make it a threat that changes how infantry can approach, while the eight-population cost and slow movement make every deployment a commitment. Treat it as a protected firing platform: limber to travel, deploy with a clear target, and let escorts handle threats that the cannon’s multipliers penalize. If the opponent spreads out or attacks from several directions, reposition or withdraw rather than expecting a single Bombard to cover the whole battlefield.
Current profile
These values describe the current profile.
Industrial Age heavy mercenary artillery
The Li’l Bombard is an Industrial Age mercenary artillery piece hired for 1,100 Coin. It takes 70 seconds to train, occupies eight population and has 600 hit points, 75% ranged resistance and 25% siege resistance. It has sight 32 and moves slowly: 2.5 on land and 1.0 in water according to its profile. Europeans, Asians, Federal Americans, Africans and Italians use their corresponding Tavern, Monastery, Saloon, Palace or Lombard access where available. The Bombard attack deals 400 damage at range 28, hits an area of four and fires every four seconds. That makes it effective at breaking buildings and clustered targets, but the long queue and high Coin cost require planning well ahead of a battle.
Protect the firing position
The Li’l Bombard’s area damage can decide a siege, but its eight population leaves less room for an escort and other artillery. Build the supporting army before hiring it: infantry or cavalry screens can keep enemy units away, while Culverins and mobile forces can address hostile artillery. Its strong ranged resistance does not prevent dedicated siege damage from destroying it. Move the Bombard to a safe firing position and avoid letting fast units reach its minimum defense; use the army to clear the route, then target a building or dense formation where the large area can matter. Replacing a lost Bombard takes another 70-second queue and a major Coin commitment, so withdraw it when the screen breaks rather than treating its high health as immunity.