Suleiman the Magnificent
Suleiman the Magnificent is the Ottoman skirmish AI personality in Age of Empires III. His profile favors artillery and large armies, often committing heavily to a major engagement. This entry describes the AI’s battlefield tendencies rather than a campaign character or trainable Ottoman unit.
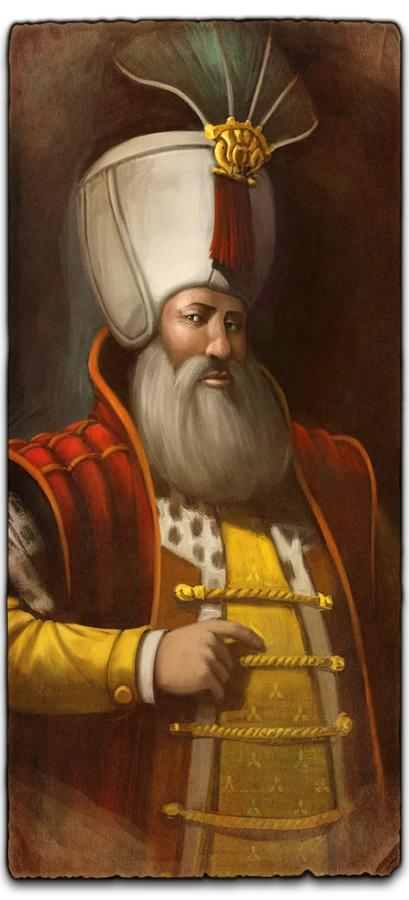
AI identity & army profile
Ottoman artillery can threaten both units and buildings, and the army may include Great Bombards, Abus Gunners or Deli depending on the scenario and available options. A large push can leave fewer units protecting distant resources or reinforcements, but the artillery itself should be treated as a priority threat.
How to prepare
Scout the likely attack route and keep mobile units ready to reach exposed guns. Protect your own artillery and avoid fighting the full Ottoman force in a position where its siege can fire safely. If the army advances into your base, look for uncovered resource sites or reinforcement routes to create pressure elsewhere.
Opening defenses and economic development
Suleiman’s early building behavior is defensive: he often assigns Villagers to erect several towers around his settlement. Those structures can make a small raid costly and protect buildings, but they do not cover every resource line or replace a field army. Later, he may add Mills and Plantations, shifting toward a more conventional long-game economy. Players should scout the base before committing to an early rush, identify tower coverage and approach from exposed sides. Attacking workers who have walked beyond the defensive ring can delay his production more safely than pushing directly into multiple towers. A player who waits too long may give him time to turn a small fortified base into a larger economy, so use the opening window to pressure an outer resource or secure map control.
Army composition by age
In standard Skirmish games Suleiman is described as a comparatively slow AI to assemble an army, and his forces can be smaller than those of other personalities. His Ottoman composition leans toward cavalry and artillery. In the Colonial Age he may field Janissaries and Abus Guns; after reaching the Fortress Age, Hussars commonly lead with artillery and Grenadiers supporting them. The artillery is the key matchup concern: Abus Guns and Falconets can be upgraded during a fight and punish armies that rely too heavily on infantry. Janissaries may reappear later, but are less consistent in the late game. Scout the actual units instead of assuming a fixed build, since his choices and resources can change the timing. Bring cavalry or artillery counters for his guns, while keeping enough anti-cavalry strength to protect your own ranged units from Hussars.
Expansion and WarChiefs-era mercenaries
When The WarChiefs expansion is active, Suleiman’s infantry choices can shift sharply toward mercenaries and outlaws. Renegados, Highlanders and Spies may form much of the infantry component shown in the post-game army summary. This is a distinct expansion-era tendency; it should not be mistaken for the ordinary Ottoman roster or assumed to appear in every match. The later Definitive Edition profile can occasionally add Azaps. These changes mean that the best counter depends on the game version and visible force: identify whether the infantry is a conventional Ottoman unit or a mercenary before committing to a target-specific counter. Mercenary-heavy compositions can be expensive and varied, but they still need protection from artillery counters and raids on the economy supplying them.
How to exploit his slower buildup
Suleiman’s relative weakness comes from pacing rather than from a harmless army. If his first army takes longer to gather, use that time to scout, secure a Trading Post or pressure a resource line, while preserving enough units to answer a sudden shipment. Avoid allowing a delayed opponent to age in peace until his artillery arrives in a protected group. A small raid can force towers and garrisons to respond, but a direct attack into several towers may lose more than it gains. Once his army is assembled, isolate the artillery from Hussars and Grenadiers: fast units can threaten the guns while your own infantry stays clear of their splash. The objective is to create two manageable fights instead of engaging his full mixed force at once.
Diplomacy, resources and reading dialogue
As an ally, Suleiman can request or offer Food, Wood and Coin, agree to a strategy, or decline military help when he says he lacks troops. Resource exchanges and dramatic remarks are personality dialogue; they do not reveal an exact stockpile or guaranteed build order. His comments about a new fort, an attack or a Trading Post provide context for an AI action, but scouting and the map remain the reliable indicators. Players coordinating attacks should check whether his army is near the target before relying on his agreement. If he refuses a request, continue with an independent defense rather than assuming reinforcements are on the way. His confident tone and generous offers are part of the character and can occur even when the Ottoman force is still building.
Water maps and trade routes
The AI behavior described for Suleiman emphasizes artillery and land forces; players should still inspect his naval production on a water map rather than treating the land profile as a complete naval script. Trade Route Trading Posts can become a source of resources or a point of conflict, and Suleiman’s dialogue reacts to their construction and destruction. A forward Trading Post is valuable only if it can be defended from his towers and army. On coastal maps, protect transports and fishing with a fleet sized for the visible threat, then use land scouting to locate the artillery concentration. A land raid may draw his army away from a shoreline, while control of the water can limit how quickly he reinforces across the map.
Historical identity and game portrayal
The AI personality is named for Suleiman I, the Ottoman ruler who lived from 1494 to 1566 and reigned from 1520 until his death. The game presents him as a proud, decisive leader whose lines draw on Ottoman imagery, proverbs and references to food, trade and artillery. Those lines establish tone rather than historical evidence for a specific match. His in-game army behavior is an AI pattern for Age of Empires III, not a simulation of the sixteenth-century Ottoman military. Keep the biography and the game mechanics distinct when using the page: the historical dates describe the ruler, while tower placement, army composition and response timing describe the computer opponent.
Quick response plan
At the start, scout for multiple towers and avoid sending a small force into their range. During the Colonial Age, watch for Janissaries and Abus Guns and keep a flexible counter force. Before the Fortress Age, prepare to answer Hussars and artillery together rather than countering only one class. If The WarChiefs is active, identify possible mercenaries; in Definitive Edition, account for occasional Azaps. Raid exposed workers and outer resources, but disengage when the main army arrives. This plan uses his slower buildup while respecting the artillery-heavy force he can eventually field.
Difficulty and changing match conditions
The described army sizes and timings are tendencies, not a fixed script. Difficulty, available resources, map access and the active expansion can change how quickly Suleiman reaches each age and which units appear. The same personality may look passive while towers and shipments accumulate, then become dangerous once artillery is upgraded. Use the first minutes to record his age, production and outer economy, and revisit that information after each engagement. A quiet interval does not prove that no army is being assembled, especially when an ally or shipment can add troops without ordinary training.
Protecting the artillery core
When the Ottoman force finally advances, avoid focusing every unit on the nearest infantry. Hussars and Grenadiers can screen the guns, so separate the artillery with a flank or a distraction before attacking it. His large assault may commit most of the available army at once, leaving fewer reserves to answer a second threat. A raid on a distant resource or Trading Post can exploit that commitment, but only if the raiding force has a safe exit. If the main army is approaching your base, defend the production and workers first, then counterattack after the artillery has fired and the cavalry has moved away.
Retreat and rebuilding
If an attack fails, use the time while his force regroups to repair exposed defenses and restore the economy. Towers protect fixed points, but they cannot follow an army; pressure a different route once the artillery moves away.
Ottoman ruler and automatic worker system
Suleiman is associated with the Ottoman civilization, whose Town Center trains Settlers automatically. That system reduces manual queue work but still needs population capacity and takes time to grow. Use the freed attention to scout, collect Treasures and coordinate unit batches; do not assume workers will arrive quickly enough to repair a damaged economy. Mosque improvements can strengthen worker production, but military spending and age advancement may be more urgent. Ottoman forces use distinct units and resource mixes, so maintain enough Food, Wood and Coin for the chosen composition.
Historical appearances and match rules
Suleiman the Magnificent is a historical ruler, not a separate playable civilization. In campaigns, historical battles or AI appearances, dialogue and scripted forces may differ from ordinary Ottoman skirmish rules. Use the Ottoman civilization entry for standard unit, technology and economy information, and use mission objectives for scenario-specific tasks. An AI personality does not guarantee a fixed attack order: visible production, difficulty and map resources are more useful signals. This distinction keeps the historical context connected to the game without turning scenario behavior into a false civilization bonus.